In the beginning there was an old Wenonah Jensen canoe.
How did this happen? My cousin, from the temple of bodily heath contracts pancreatic cancer and vanishes from our faces in six short weeks at age 57. Growing up Steve was the one person I figured would outlive all of our close family. His eyes gleamed with nature, his words preached truth, and his body consumed organic.
Link to Park Ranger Steve's Site
Ranger Steve Robinson - Youtube Slide Show Memorial - Steve and Amelia musicSteve was a Ranger...A National Park Service Ranger that wore nature on his shoulders and hair to his waist. Most of Steve's NPS was his 25 years at the Flamingo location where eventually he met his true love Amelia. My fondest memories of him were sailing and music making, Steve could play guitar and sing well.
Steve's later days were in Rocky Point, Oregon - he was a seasonal Ranger at Crater Lake National Park for many years escaping Flamingo for summer stints.
Upon Steve's passing I was motivated to learn more about the Everglades that Steve so loved, nurtured, and protected. First thought was to make the 100 mile Wilderness Waterway trip in my 15' custom Bell "Rob Roy" peddle driven kayak. It was not long before I realized it would not have ample capacity for all necessary gear including 10 gallons of drinking water to safely make the trek. My thoughts then turned to a canoe, most can carry a much greater load. I then found myself simultaneously in a Mohawk canoe acquisition and the very proud keeper of one of my cousin's canoes. Of course the Wenonah will be making the journey but the Mohawk will be of use nearer home and Weedon Island Trails.
This is a project to modify Steve's Wenonah canoe into a Glades one arm sailing ship...with his guidance.
Steve and I had a few exciting sailing adventures in our teens and early twenties along Floridas west coast, Tampa Bay and south. His loving wife Amelia and proud son Darby graciously turned the old Wenonah keys over to me a short time after his departing. It is my intention to nurse Steve's old Wenonah back to health and then into an Everglades time sailing capsule. Steve had paddled a canoe from Tampa Bay to the Everglades more then once; he actually lived on an island in the Ten Thousand Islands for quite some time. Most supplies, other than sea food and rain water, he paddled in. My planned solo adventure will take me through about 200 miles of Wilderness in the Everglades with Steve as my "Jiminy Cricket" guide.
I have never been through the Everglades waterways, bar a catamaran delivery sail from Sanibel Island to Marathon in the Florida Keys via a Flamingo stopover in the early 80's.
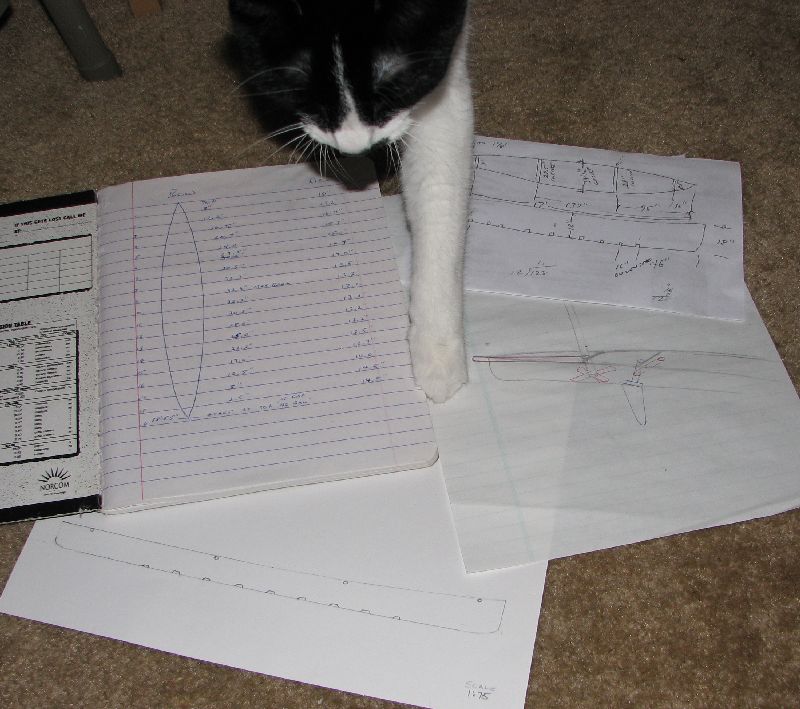
On this page I will try to describe some of my thoughts and building procedures used to turn a 1985 Wenonah Odyssey Jensen 18.5 Green Canoe into "Robinson Calusa".
Click on below photos for larger view - click the "back" button to return
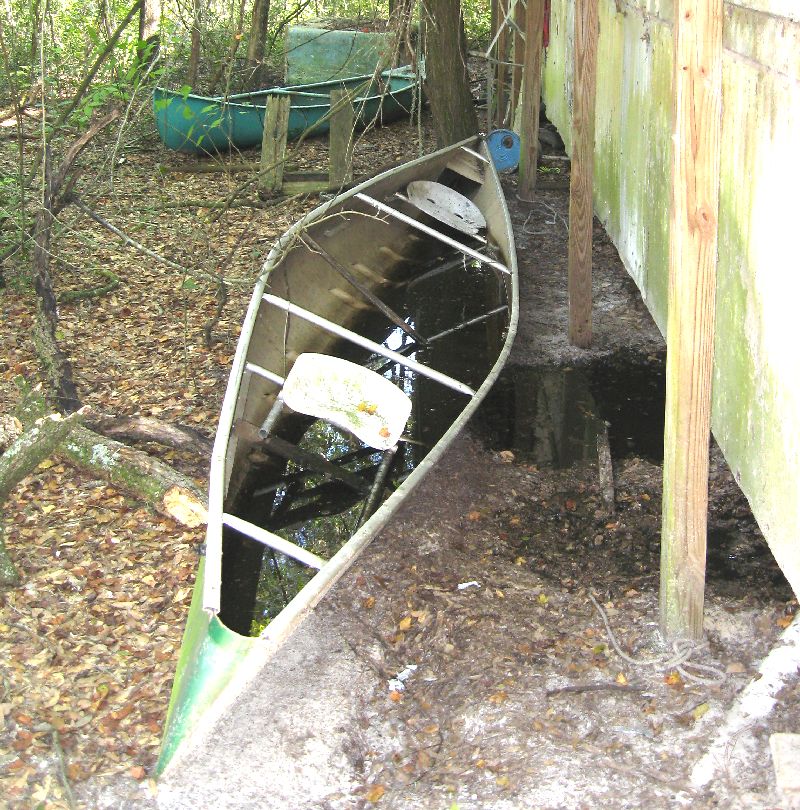
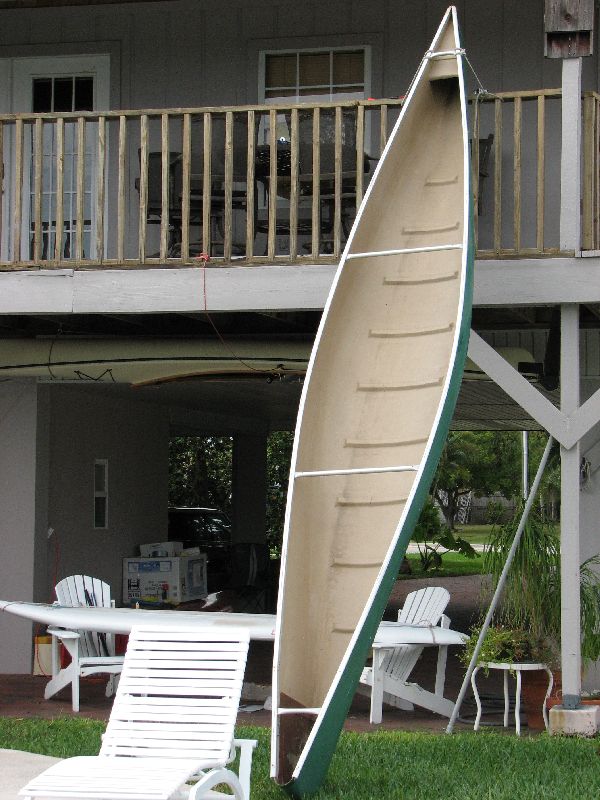
Wenonah as located on old homestead property - vandals had cut chains and left three canoes upright - luckily something or someone must have scarred them off years before - tree limbs and countless leaves filled the inside in a wild tea soup. Must admit that my first thought was to turn and walk away, no way, this was Steve's Wenonah, a priceless bit of history to me. Steve's brother Mike and I bailed the water out of the Wenonah and a huge 20' Grumman canoe that he would take care of.
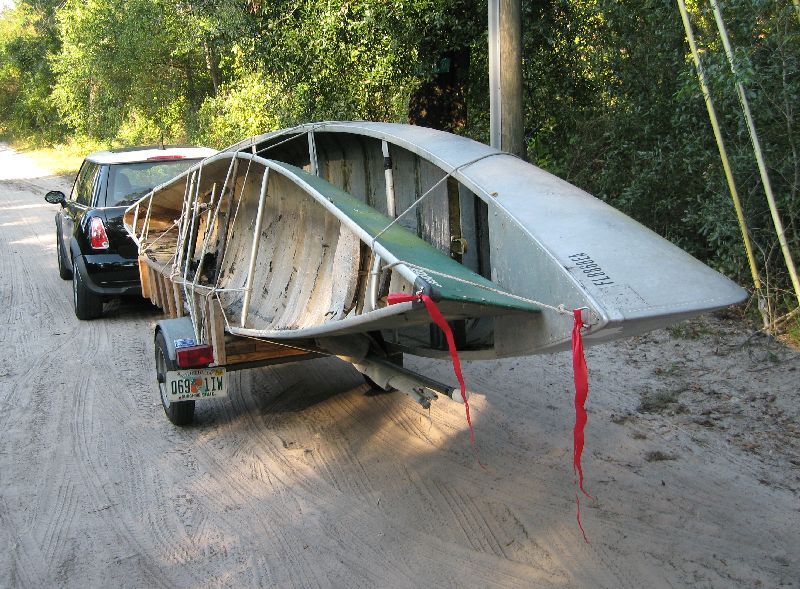 Mike and I tried cutting a path back through the woods to the old homestead. About 30 minutes into the hand clipping we realized it would be easier to drag the canoes out to the road. Mosquitoes and sweat sped up the cranial processes. We somehow managed to get the mammoth Grumman and Wenonah loaded on my tiny trailer. What a sight, my Mini Cooper tow vehicle would probably fit inside the gargantuan Grumman. We tie the canoes down, bid farewell to the old homestead, and off we go with watery eyes.
 First thoughts on the Wenonah were to get it sea worthy. I gave it a good wash job, put some duct tape over the cracks, grabbed a paddle and GPS, and out to the dock we went. My first paddle proved that a long narrow rounded bottom hull was fast and also tipped easily. I could hit 5 knots crouched in the center with my knees on a cushion going all out and it glided easily at 3 knots. In my opinion the tracking was not up to par being accustomed to the peddle drive in my kayak with fingertip rudder control.
Thoughts of alligators, crocodiles, and waves tipping the Wenonah's stability threshold did not fill my comfort zone. I'm quite sure that Steve mainly used his high performance canoe in the flat backwaters where it would really shine. I am a sailor and sailors like sail power. Steve also loved to sail, he and his brother Mike had two identical canoes custom built for them with the intention of connecting them together forming a sort of catamaran. Unfortunately they were over built and were too heavy to be practical in that configuration. That did not stop Steve, he added a small crude lateen sail rig made of aluminum plumbing pipe (mast), copper tubing (spars), and a real Dacron sail most likely cut down from a larger one. I have saved the rig for sentimental purposes - it is heavy. I come from the high tech realm of carbon fiber, Kevlar, and epoxy. This Wenonah was very high tech in 1985 - it is made of fiberglass TufWevae with Kevlar reinforcement in critical bow and stern areas - heck of a canoe in the day to say the least.
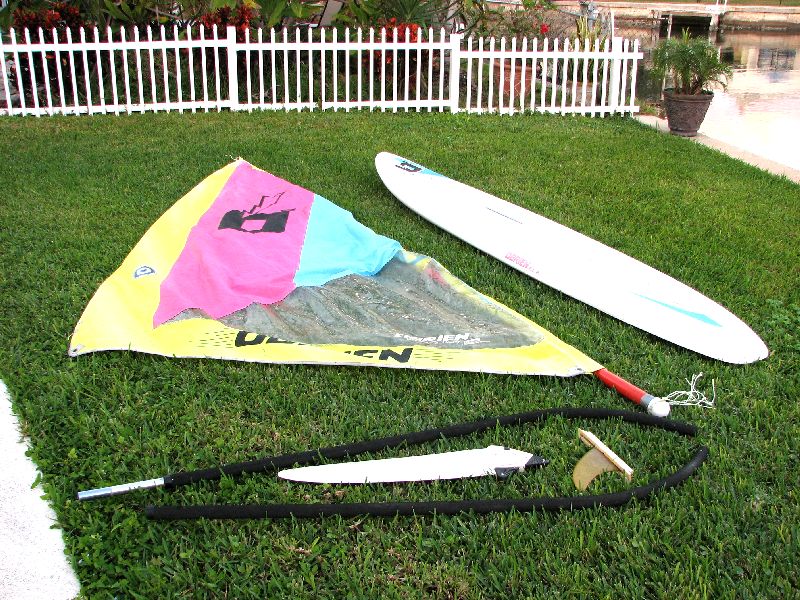
So now I'm thinking outrigger if I want a fast sailing canoe and not a submarine. What could I do without reinventing the wheel? Hey, a windsurfer looks to have about the right components for my project...I'm on a mission for windsurfer parts on Craigs List and eBay. I already had an old repaired 15' windsurfer mast and it looked about the right size and light weight but,,, it was fiberglassed where the boom fits so I assumed it had been broken at some point and repaired over a crack. I am taking little chances deep in the Glades with a breakdown so on with the parts search.
The first deal I found on the local Craigs List...a windsurfer '12 board, fiberglass mast, partial wishbone boom and fin for $40 total delivered to my door, fantastic but the mast seemed a little too flexible! Wanting a stiff carbon fiber mast for strength and light weight I keep looking - wow, a one piece 100% carbon fiber racing mast for $25 but it also has fiberglass around the boom area so I again suspect an internal fracture.
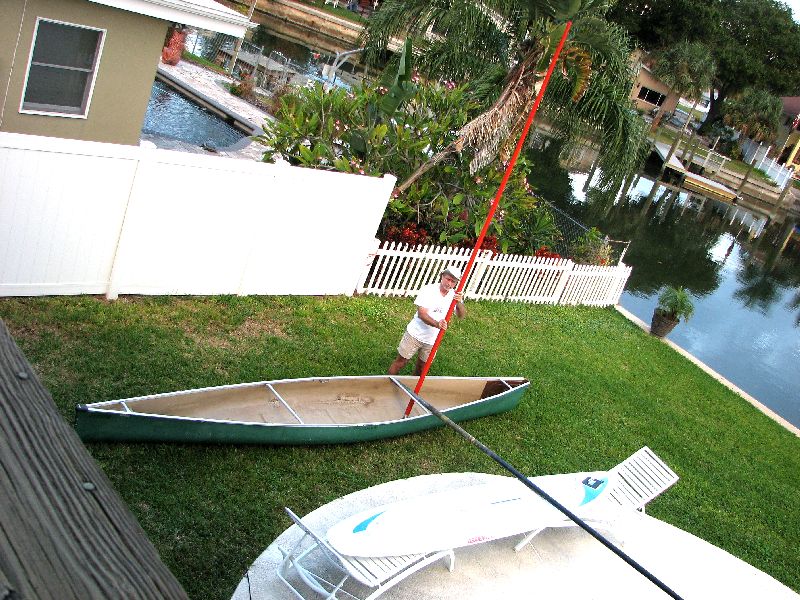
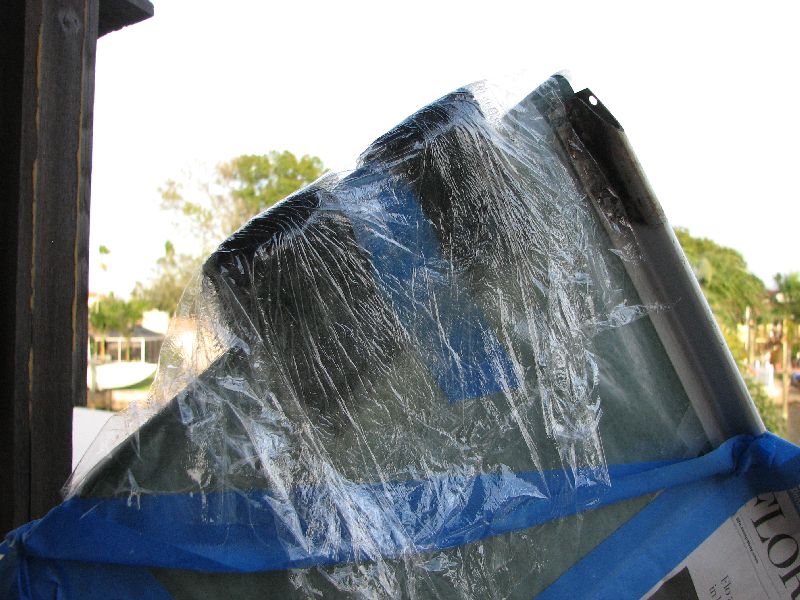
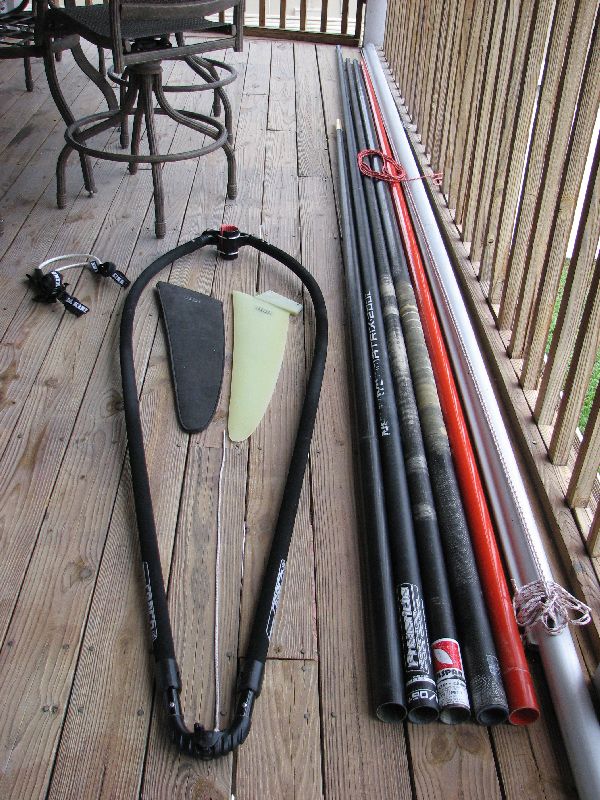
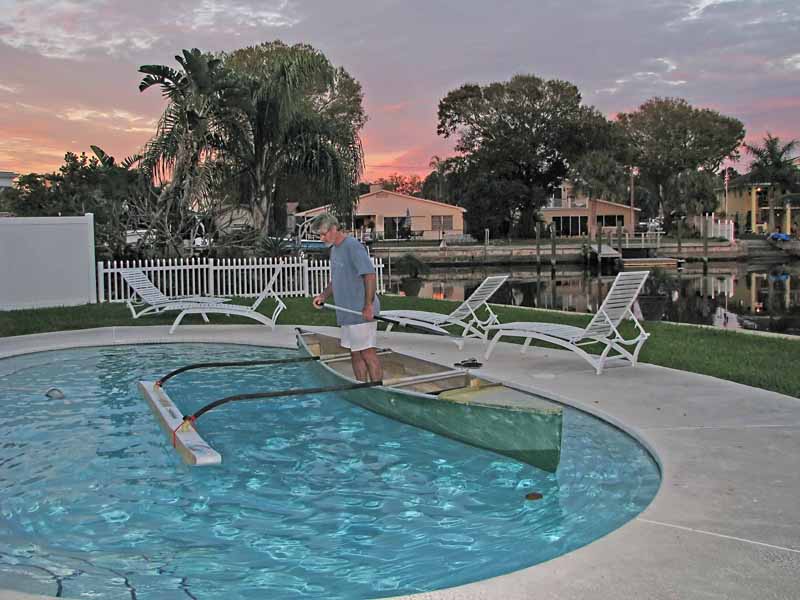
This is a shot of me holding up a fiberglass mast for perspective and approximate position. There will be a Carbon Fiber mast in it's place in the final build. The windsurfer board is washed out in the photo but I was trying to size up the distance the ama should be from the main hull for reasonable stability. This is not an exact science and since all variables are constantly changing in sailing I just sized it up from experience. Another beer the sail goes further out and the ama comes closer in. The reality is that I am working with what I have available.
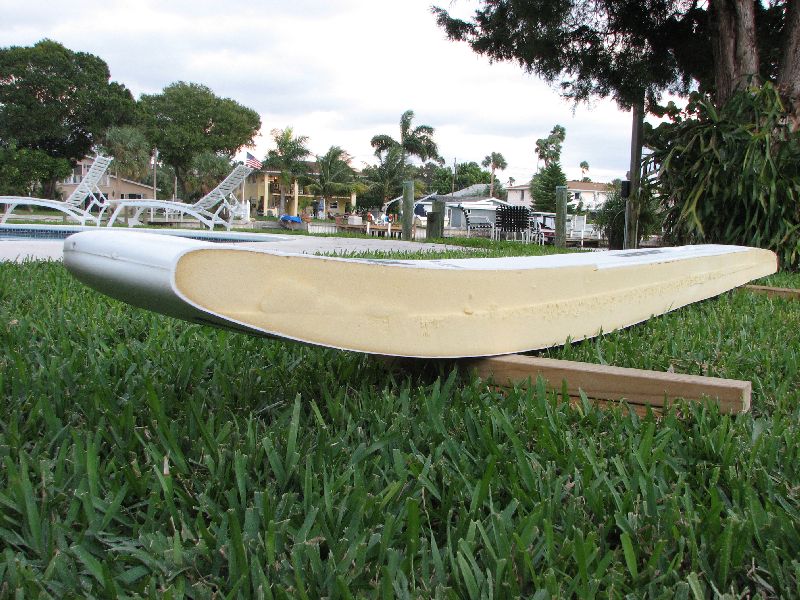
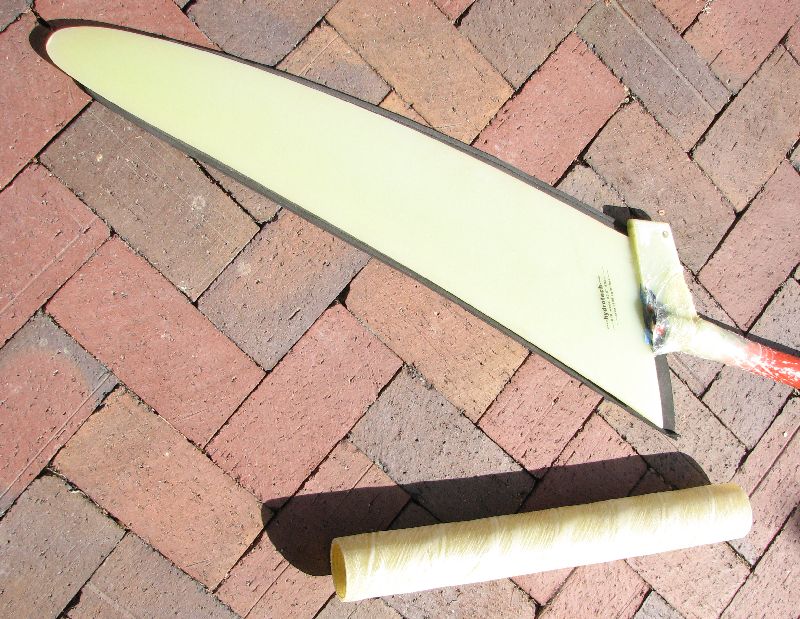
The windsurfer board looks to be just about what I had imagined for an outrigger, stripped of its sides - cut the heavy sides off with a carbide blade in a handheld skill saw. Just drew some lines with a straight edge and whacked away - came out pretty nice...still need to sand the foam in the center where the blade would not reach and fiberglass over. This is my least known piece of this entire design. It seems light enough and I calculated the buoyancy at about 160 lbs subtracting 15 lbs for its weight. What I am concerned about is the noise and vibration I'm thinking the 6" wide flat bottom may generate...on the other hand the nicely shaped curved up bow should generate quite a bit of lift at speed increasing it's buoyancy properties many times.
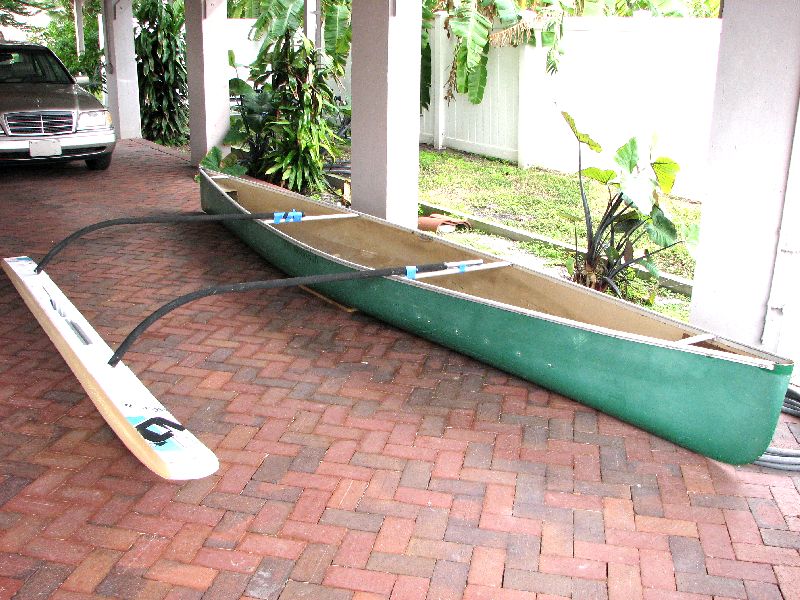
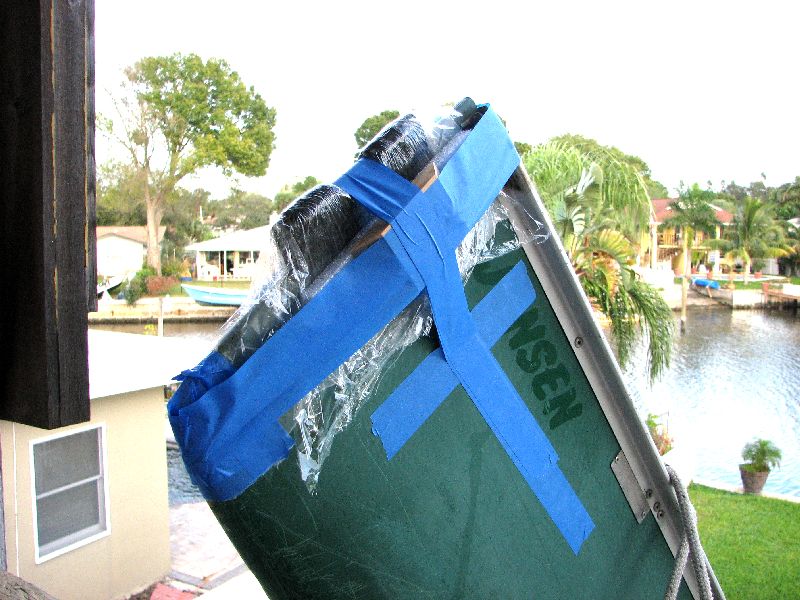
I was planning to use the windsurfer fiberglass mast as the aka's (outrigger connecting arms) but in the end I felt the windsurfer boom sides would fit nicely and looked great with the arch - they are more streamlined and lighter weight - I just hope they have the strength to hang in there! This photo shows the approximate layout.
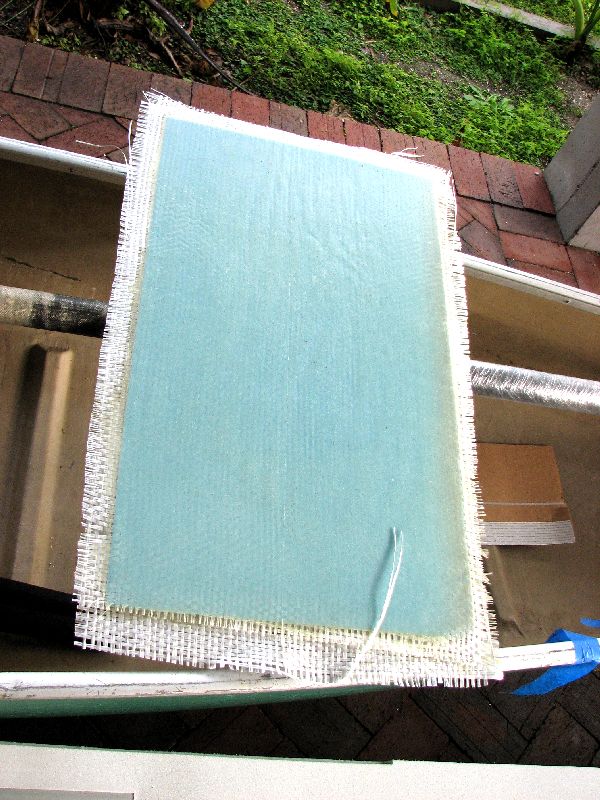
I know there will be a lot of torque on the thin hull section between the mast mount and forward aka and leeboard so stiffeners will be made. I decided on fiberglass/epoxy laminated flexible PVC closed cell foam for its strength to weight ratio and rigidity. I made some hatches out of Hexacel core material in the past on my Stiletto 30 catamaran but that was 1/2" and more difficult to fair the edges of the larger cells. This is a sheet of 1/4" Diviny PVC foam core with a layer of woven roving (heavy fiberglass) and epoxy setup on each side. I first cut the woven roving to fit an inch or so over the edge - then lay out household wax paper on the underside so the excess drips will not glue the foam to the surface (plywood) below - squeegee the 3:1 epoxy onto the foam covering well - apply woven roving - add epoxy and squeegee until completely saturated - apply another overlapping layer of wax paper over the top and squeegee from center out until smooth - flip the entire sheet over and repeat on opposite side - Wait 24hrs before removing wax paper
I could not find a suitable material for the outer aka's where they will connect to the ama (outrigger)...ended up with a rigid PVC 45deg end and short sections of 1" PVC pipe glued in place - I felt the 45deg connector would be the weakest link so I epoxied some Kevlar thread (out of thrown away fiber optic cables) around the end mating to the windsurfer boom aka's and 4 or 5 wraps of fiberglass 2" tape over that. Did I mention that the outrigger is hinged and will collapse to the side of the canoe for narrow passages? It should still provide some additional stability even collapsed. I plan to put a 3/16" Kevlar line from the bow to the rear aka at the ama end and vice versa to the stern with the aka's locked in place at the opposite end of the fulcrum on the hull lifting tubes.

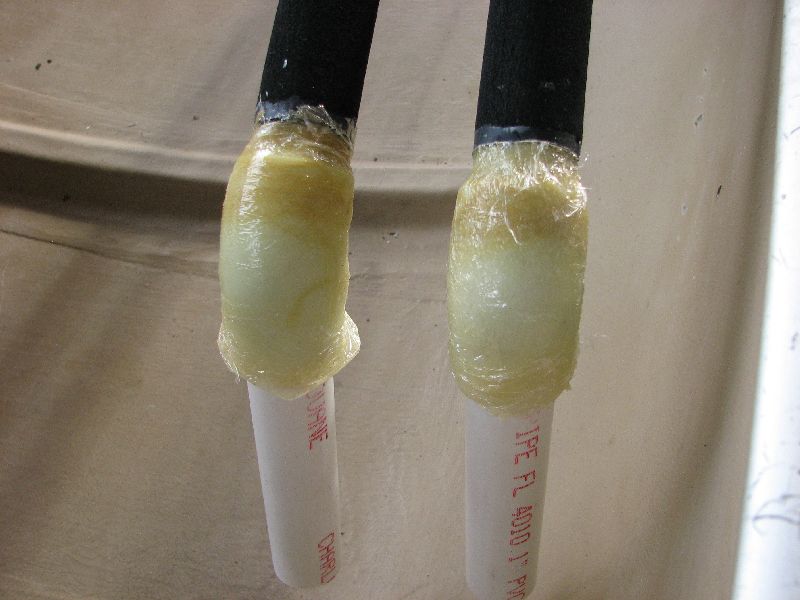
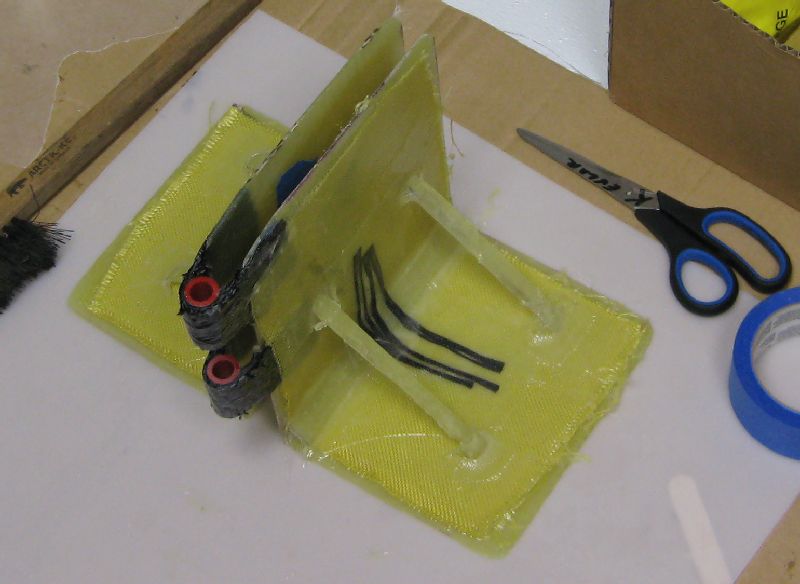
This photo has the ama fiberglass mounting tubes made ready for placement in the ama - made by wrapping wax paper around 1" PVC tube about 4 times and laying up 3-4 layers of 9oz fiberglass cloth. These will be the bearing points for the ama and aka's to pivot.
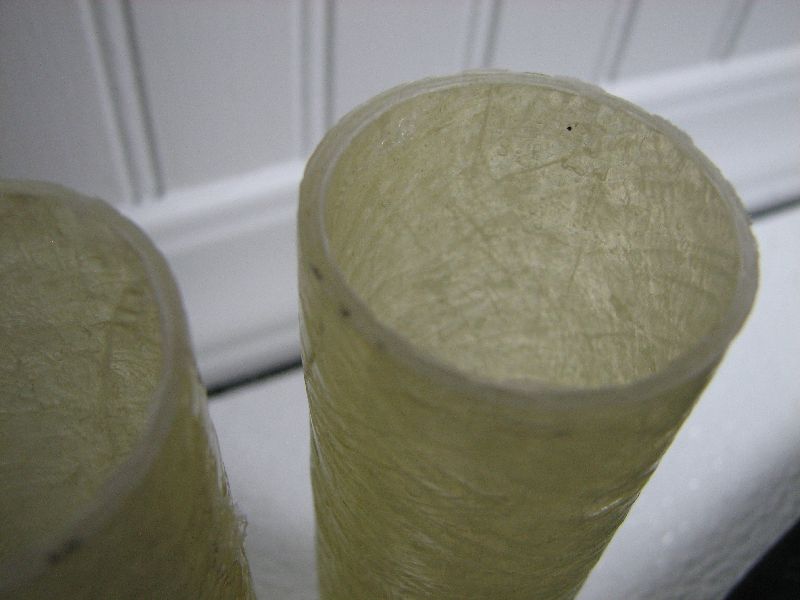
Close-up of the ama pivot tubes before epoxyed in place. I think these will be plenty strong for the schedule 40 PVC that fits in them, what I'm a little worried about is the strength where they fit into the foam core of the ama. I plan to add a few hook like appendages and connect a bungee cord that will keep the ama on the aka's. Sort of like the Hobie Adventure Island ama's are designed - a flexible retention strap
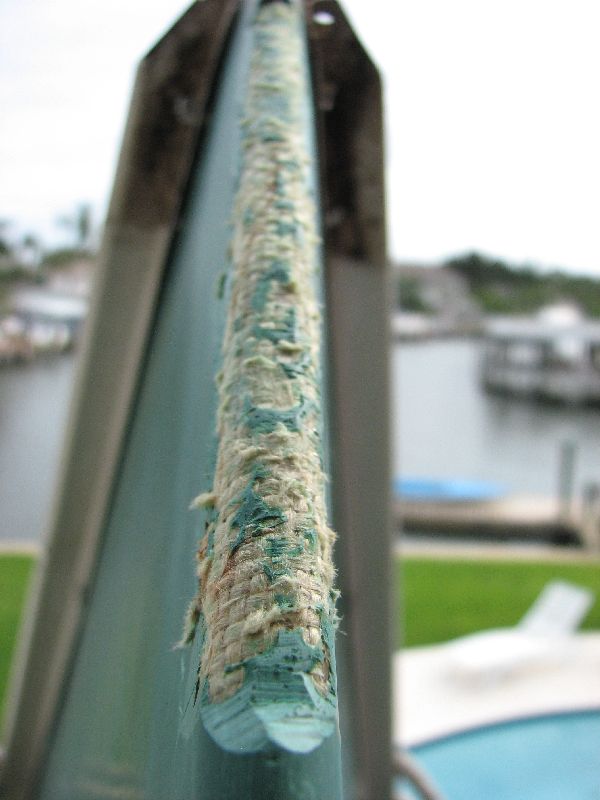
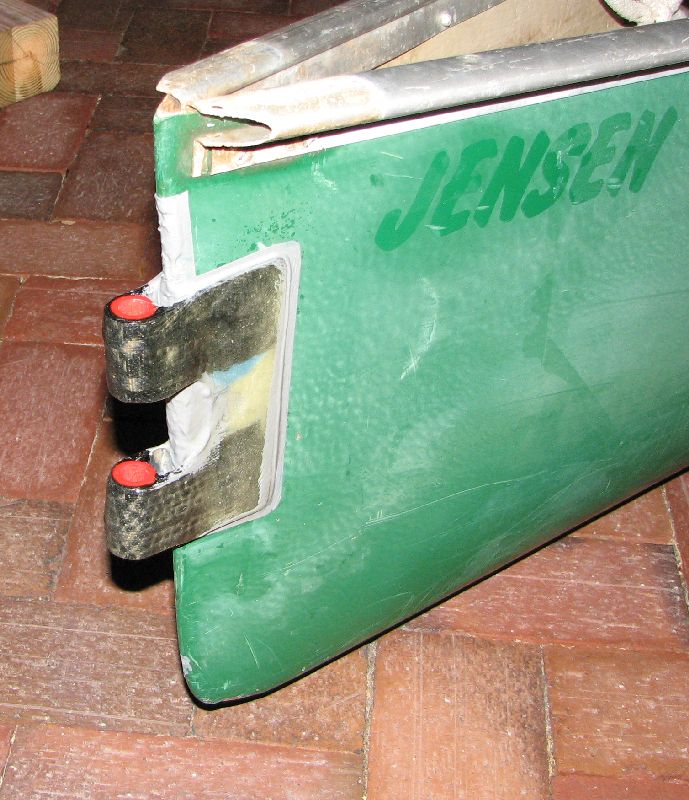
The stern of the Wenonah had very thick gelcoat and was cracked in numerous places. It at one point in its life had a rudder which was merely bolted on with two 1/4" brass bolts. There were no compression sleeves inside so the Kevlar flexed while the gelcoat cracked. Wenonah uses Polyester resin to laminate the Kevlar; you can see from the photo that polyester does not saturate Kevlar very well. I was able to easily chip the gelcoat cleanly off of the Kevlar with a sharp chisel. This is one of the reasons I only use epoxy. FYI - Wenonah recommended that I use polyester resin and fiberglass to repair the crack in the hull...I used epoxy and Kevlar!
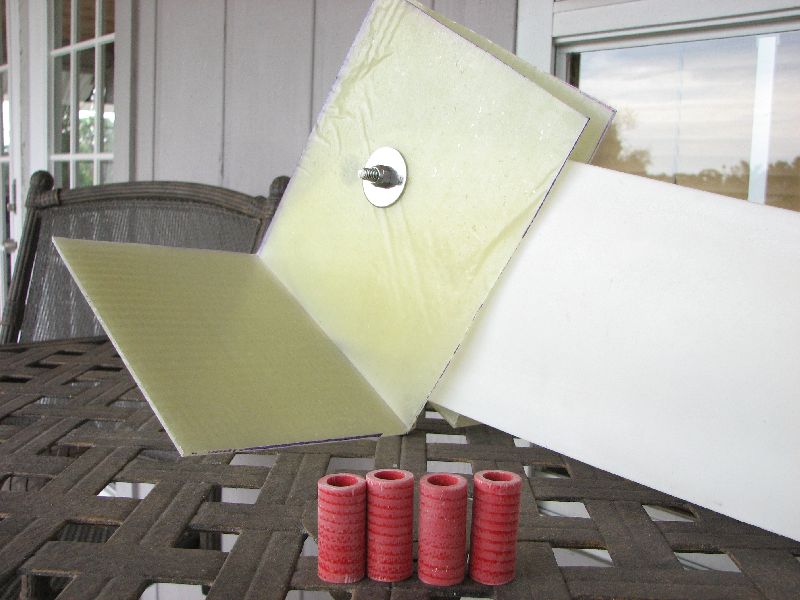
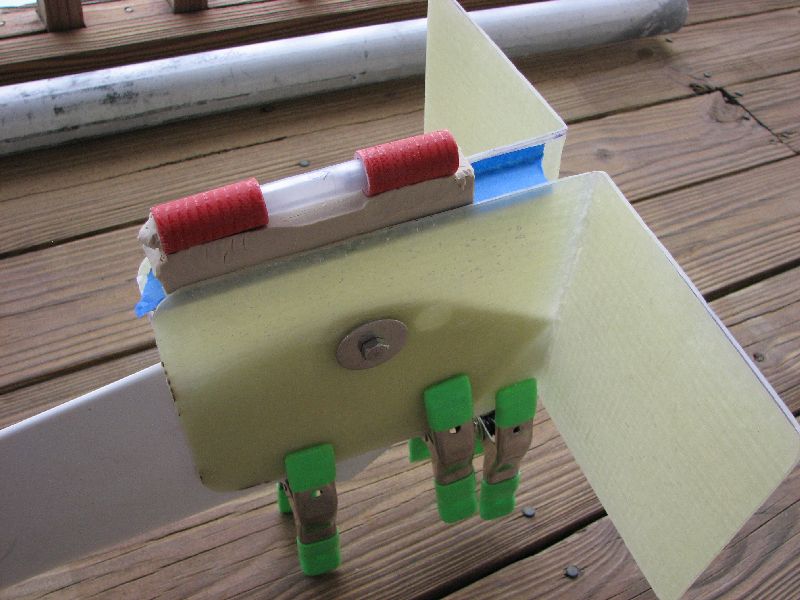
The following photo is early stages of the rudder bracket sides with windsurfer centerboard in place for a rudder. The four red tubes were cut from an industrial fiberglass pipe I had purchased at Dons Salvage many years ago on another project. They will be used as "pintles and gudgeons" for the rudder brackets and stern mount coming up. Well actually I think the correct term might be gudgeons and gudgeons with a 1/2" aluminum tube for a pintle.
Canoe is on end for making and installing the rudder stern mount. The mount is formed on the hull before bonding. That way it can be better shaped and all the sharp edges trimmed prior to final placement. It also allows easy fitting to the rudder headstock without a hundred trips to the back of the canoe.
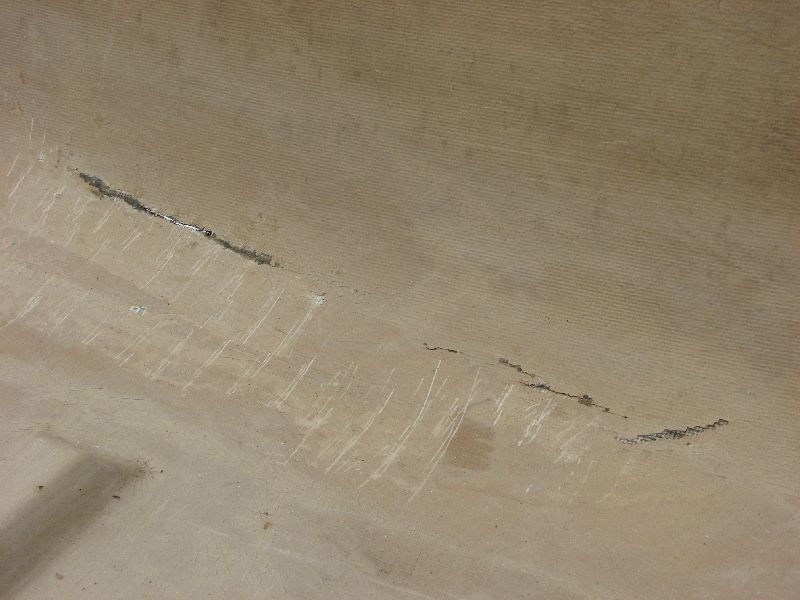
These are cracks in the hull. Amelia indicated that Steve tried to patch it with some epoxy. It appeared the epoxy never setup correctly and was still like hard tree sap when I scrapped it off...fiberglass cloth and all...there was good old duct tape on the outside of the hull to prevent the final water intrusion. For some unexplained reason there were small spots of the same type uncured epoxy resin all over the inside of the hull...they were easily scraped off but it looked almost as if an epoxy repair was attempted in the wild and before it tried to harden it was flushed around inside and stuck in little beads all over - weird - wish I knew the whole story. My hunch is that Steve tried to patch the crack in the wilderness and his supplies were either defective or out of date so it would not setup properly, then when he tried to carry on it sprung a leak and the water moved the "not fully cured" mix around the canoe.

Crack in the 3rd support beam. This would have taken quite a pounding to happen - Kevlar is strong stuff in tension. My guess is that the canoe was either dropped or hit a non-movable object at speed with a full load of gear near this area and on the Port side. This type of break would have occured from outside pressure.
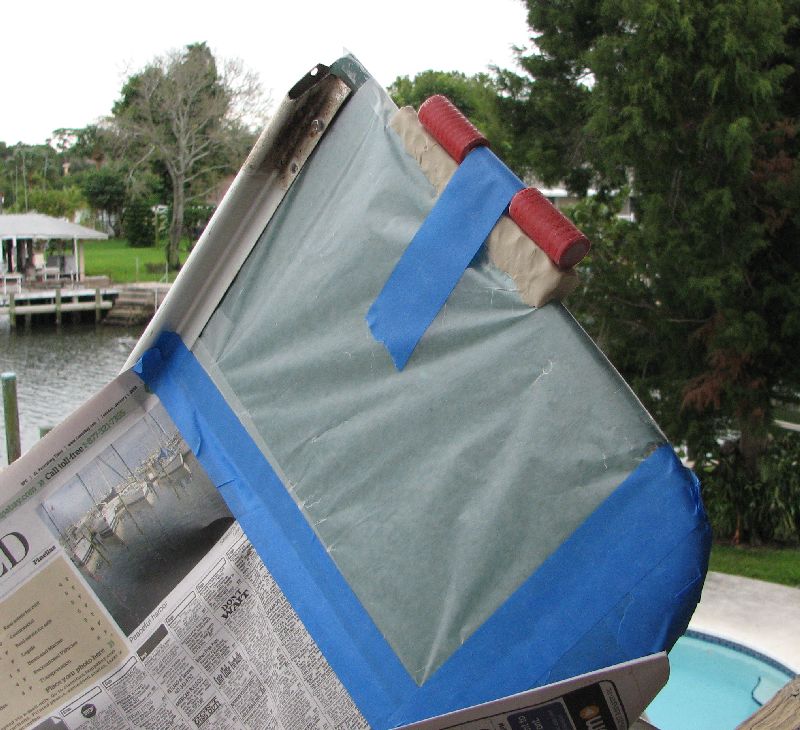
Setup to mold the gudgeons. Wax paper to prevent sticking to the hull and modeling clay to hold the gudgeons in position...not visible in the photo but I used a 1/2" ink pen center to keep the alignment - the blue tape is over the pen center. Epoxy is messy stuff so gloves and disposable paint brushes and mixing cups were used...the mixing cups are turned upside down on wax paper from previous steps and allowed to cure then chip the rim off and reuse 4-5 times...brushes are toast.
Rudder with gudgeons in position - ready for lamination. Modeling clay was easy to work with for this thick Carbon Fiber lay-up but was a real chore to remove afterwards. I removed as much as possible by hand and scrapers then tried a regular water hose and it was not going well so I go for something with power. Would you believe the pressure washer was having a difficult time dislodging the tight areas and I was soaked from the deflected spray.
Due to the extreme stress on the gudgeons thick carbon fiber was used with fiberglass covering and to tie the two in place for later mounting. This is really tedious work, the thick Carbon Fiber material wanted to spring back straight given such a sharp bend around the fiberglass tubes. On top of that I was working with two layers in two seperate places then tying them together with multiple layers of fiberglass cloth. It was hot outside when I started this piece and the epoxy starts to jell in about 20 minutes. That is 20 minutes from the time you start stiring the 3:1 mixture together so it really is more like 15 minutes. This is not like the YouTube videos you can watch laying up a small flat piece, no, no, no, this is tricky. Once the epoxy starts to jell it will not saturate the materials properly and the whole thing can become toast. One minute too long and you can destroy hours or days of prep work and a good deal of expense not to mention the fustration. Lucilly I have only come close and not lost any parts yet. I once rebuilt an old homebuilt houseboat hull and tried to layup too much polyester resin at one time on a hot day and it took me 2 days to grind down the thich goo. Resin has little strength on its own and is quite brittle.
Another shot with tape and wood blocks applying light pressure during cure. This takes patience, pull a little here, push a little there, keep tabs on it until it kicks off pretty good. This epoxy stuff just creeps on you until it sets.

Connecting the two upper rudder support halves with thick Carbon Fiber. This was the last of my Carbon Fiber stock and since that time the stuff has gone through the roof in price. The aircraft industry is using a lot more of it in the jumbo jets as are many other large product builders. This is creating a shortage driving the market up. A local shop I buy some materials from (fgci.com) went from $45 to $65 in one month for one yard of 50" wide 6oz CF cloth. The same size in Kevlar is less than half this and fiberglass is much less expensive. I use all three in this project, it all depends on the loading of the piece.

Carbon Fiber has incredible compressive strength but little shear, impact resistance or flex before failure. Kevlar is the lightest of any fiber reinforcement and actually stronger than Carbon Fiber in tensile strength and will take incredible impact and flex before total failure but it does not have good compressive strength. It is hard to work with...ordinary scissors will not cut it and when sanding a epoxy cured piece it frays up the edges. I usually cover Kevlar with fiberglass cloth for a better finish. I also use a Kevlar/Fiberglass blend cloth as the fiberglass has good compressive strength and Kevlar does not.
Of the three reinforcement fibers I use, Kevlar is favored in the price/performance catagory. I only use epoxy resins with these materials...it is more difficult to work with and more expensive when compared to polyester resins but well worth the difference. In my opinion Polyester does not penetrate the aramid fibers (Kevlar) well enough for a complete bond...it only seems to grip the surface fibers as indicated in the chipped gelcoat photo. There are other aramids and blends/hybrids like black gold (Carbon Fiber/Kevlar weave) but they are very expensive and not available locally in St.Petersburg.
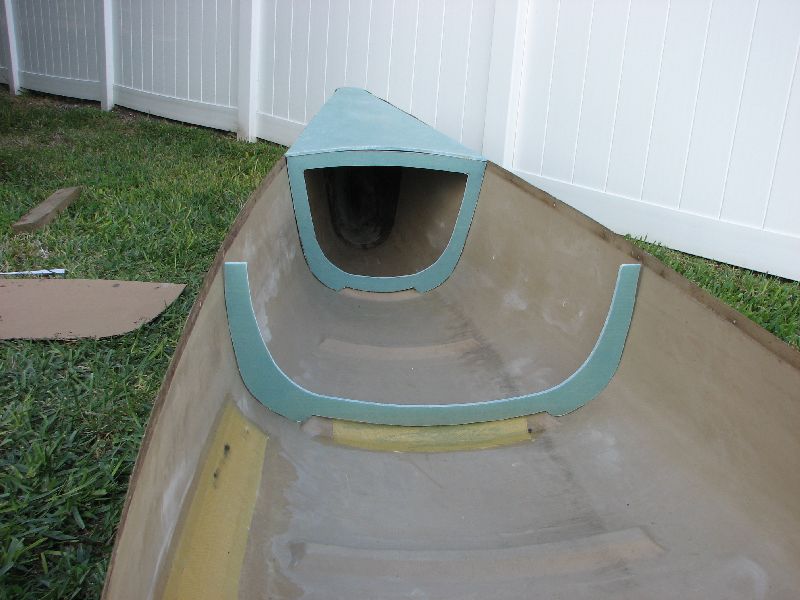
I decided on a covered deck on the bow for multiple reasons. 1) Steves older sailing canoe had a small covered deck. 2) The top of the mast base will need the greatest support so the deck will tie it all together. 3) The deck will keep the boat drier. 4) Beneath the deck will provide excellent protection for stowed items from the elements. 5) It forms a perfect support surface for a bow sprit. 6)The existing rub rail was cracked on the Stbd side in this area. 7) Forms the perfect mold for closed cell Urethane foam flotation at the peak. 8) I like the looks!
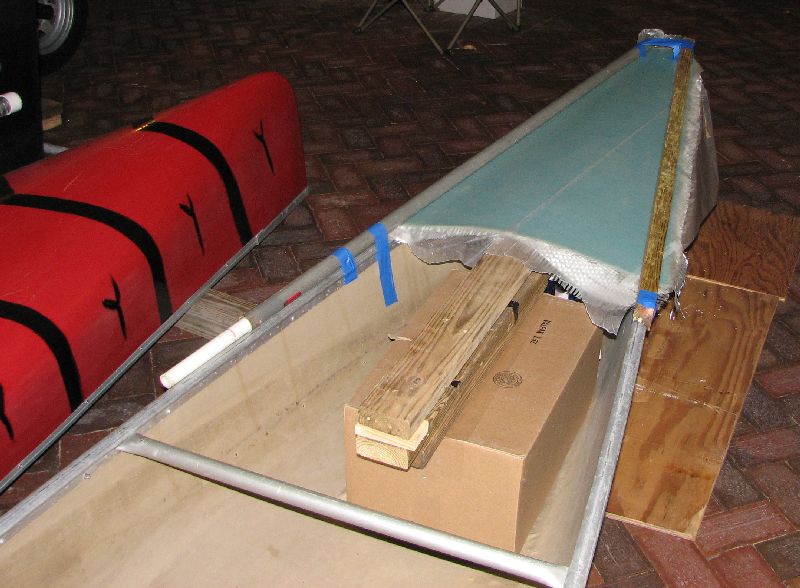
I did not want A flat deck that would hold water but a curved one would present much more of a challange. It needed to be the exact shape of the gunwales. I braced a 2x4 beam in the center for the arc I was after, cut the basic shape of marine PVC foam a little larger then needed and laid up one layer of Woven Roving anf one layer of 6oz fiberglass cloth over. After epoxy and glass I placed wax paper over, squeegeed the excess resin out and bent over the 2x4 with supports on the sides as seen in the photo. Once it had set overnight I removed and repeated the glassing on the inside now that the shape had been formed.
I'm doing a lot of simultaneous projects now however the photos are mostly in chronological order. The finished rudder mount is now epoxied in it's final position on the stern using JB Weld from the auto parts store. I grind down through the gelcoat just to the underlying Kevlar weave in preperation. The JB Weld has a strong thickening material already in it that fills the deep sanded grooves well. This makes the previously weak stern almost bullet proof.
Finally, a good deal from a nice guy in Palm Harbor on a perfect two piece tall 490cm (16') carbon fiber Neil Pryde Freeride mast, Reach Boom, and Hydrotech G10 60cm weed fin all for $150...now the nice guy part - he included an additional mistral carbon fiber two piece mast that the lower section had been broken for FREE...this should make a great mizzen mast or shortened main mast in the future...many thanks George!
3rd round with the rudder housing...added Kevlar (yellow cloth stuff), a few strips of carbon fiber and some other small pieces of roven woving cut off the excess of other parts. I save every trimed off piece larger then 1/4" for other reinforcement areas - very little waste. All the good reusable stuff our society throws in the trash today really bothers me, besides, high tech materials are expensive, even the small pieces add up. Then shipping, fuel, packaging, time...somebody stop me!!!
Even more support near the lower back edge is desired. I plan to add a few small 90 deg core pieces cut from the outer edges of the bulkheads piece. Then fair it off (sand paper and grinder) to remove the sharp edges and coat with a final layer of epoxy. It may not look pretty to some folks and they will comment that UV damage from the sun will ruin it but I like to inspect the structural components frequently for any signs of weakness. This gives me the opportunity to strengthen the area before complete failure. I keep the canoes and covered from the sun except for use anyway. With the amount of time and energy going into these little vessels I will protect at all costs and this one is my pride and joy.
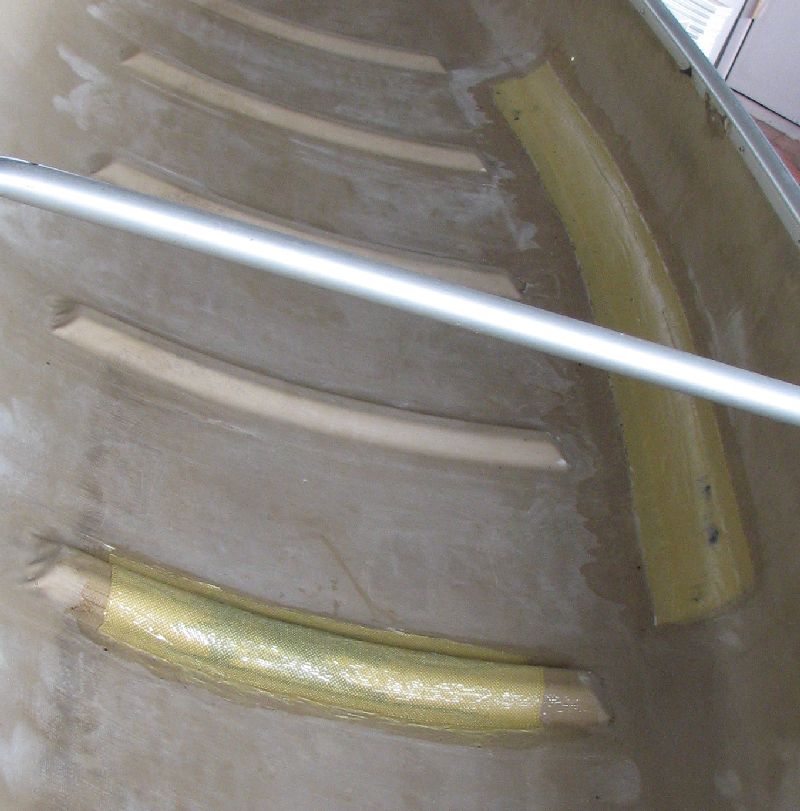
Repairs made in Kevlar and laminating epoxy to the cracked areas. Two layers on the side and one with some Carbon Fiber strands below for the support beam. The repaired areas should now be stronger then the surrounding hull. If you look closely you should be able to see the black strands directly over the old crack through the Kevlar.
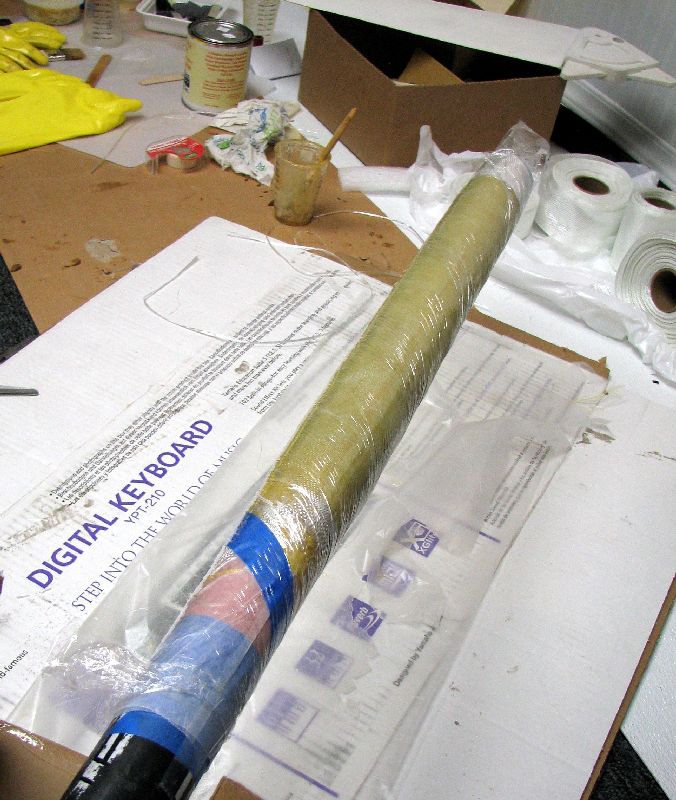
I looked for the longest time for a good mast base. Considered aluminum tubes and other items but none seemed to be the exact size or what I really wanted. So I wrap the mast base with thick plastic and, you guessed it, wax paper, a little longer then required. This piece needs to be very strong so I start with a few layers of a Kevlar/Fiberglass weave I had from a previous project then six layers of woven roving finished up with three layers of 6oz fiberglass cloth spiraled tightly. This was all laid up in one setting for the greatest strength - I must work fast and have every piece close at hand, all work was performed solo with exception a few in which my wife added an extra hand or two. I had more then a few anxious moments working with the epoxy, Pam helped ease the stress level...
Inside view of the base removed from the mast mold. The yellow/gold is Kevlar and the little voids in the resin will not matter as I have a sheet of pure PTFE "Teflon" that will go between the mast and the base. OH, the plan is for the mast to rotate! When the going gets rough is no time to be fooling around with a wild sail in a canoe. I'll just roll it up as much as needed and keep going.
This is a shot of the windsurfer fin, soon to be sailing canoe leeboard, now attached to a mast section with Kevlar and glass cloth - the now trimmed mast base below.
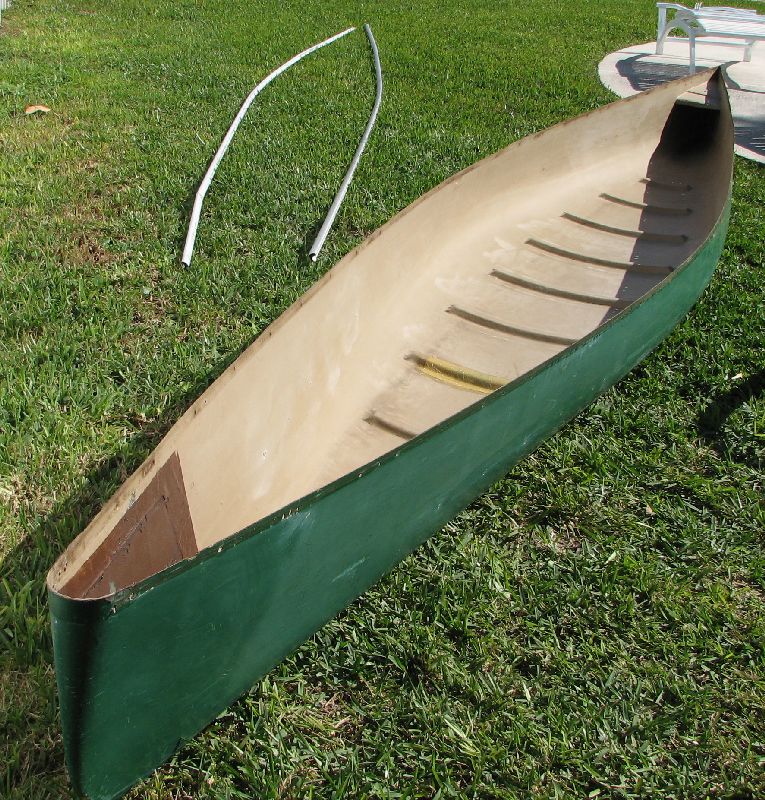
Rub rails removed yielded a very flexable canoe hull. It took a lot of scrubbing to rid the rails and bare gunwales of 22 years of ant farms and debris build-up
Cutting out the frames took a good deal of time measuring and trimming. I made a cardboard pattern, visible in the upper left of the photo, then transfered to the previously made woven roving over PVC foam panel. Used jig saw with metal blade and the fit is pretty good.
I'm leaving out a lot of steps here as most of you will not even get this far. The abbreviated version is glassing all these pieces in place over the next two weeks working almost every day after my day job and weekends (every spare minite I can muster up). The deck and forward frame are glassed in place - additional Kevlar layer placed over the deck where the mast base fits - mast base is mounted with Kevlar and many layers of glass both at the upper and lower attachment points. A small spray shield is built on top of the deck fitting to the mast base for even more support. The ama is now foam filled, glassed over, and hinge tubes epoxied in place - aka sections are glassed together - holes drilled and stainless steel bolts mount aka's to the canoe cross support beams (they do hinge) - rub rails are trimmed and shaped to fit the new fore deck and more...Whew!
Yip-Yip-Yipee...in the test tank at last. I can lean as far as possible and the ama only sinks about two inches. I can make the ama raise out of the water while leaning on the port side but I'll never be over that far in practice. Now to get the rudder and leeboard mounted and ready for sea trials...

Rudder coming together well - almost ready - just need a few more tweaks and a connecting control arm. It may not look like much but it is very light amd strong yet somewhat flexable.

Support lines are connected, leeboard fastened, rudder ready. The two lines crossing at the aka ends are Kevlar and will not stretch. They will take some of the loading off of the arms and prevent oscillations.
The windsurfer sail is designed to fit close to the mast base and be stretched very tightly, enough to bow the mast. As you can see here it is bunched up at the tack and will not perform very well but that is to be expected at this point. Just getting ready for the first test. I'm mainly out to get a feel for the leeboard position which determines helm...to far forward and the boat will have weather helm (pulls into the wind), to far back and lee helm (pulls away from the wind). I'm after neutral helm leaning towards a little weather helm. A little weather helm is good. If the wind hits strongly before I have a chance to furl the sail it will automatically round up into the wind, therefore spilling more air and removing the pressure.
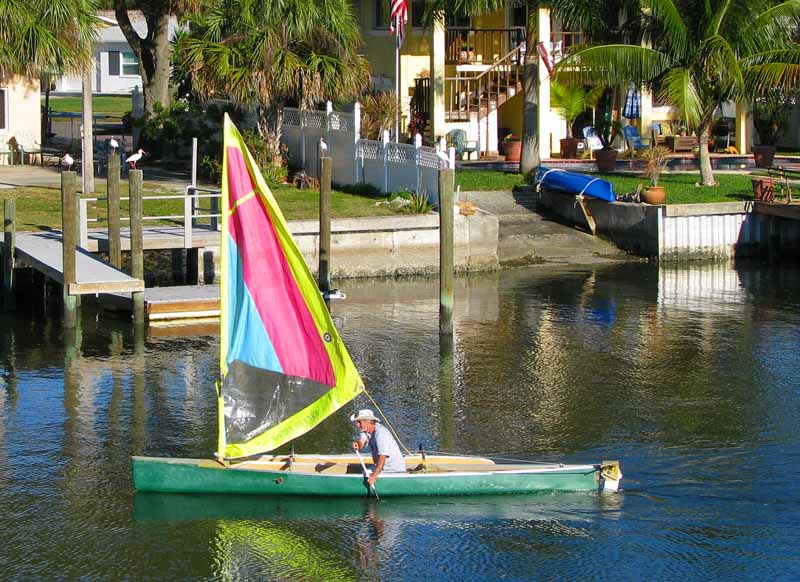
Maiden Voyage - after three months of what if? I'm out on the water...the first baby step in many future adventures for Robinson Calusa... I started off with average expectations considering most of the parts are not fully completed. First tack I realized the windsurfer sail was not going point very high without it's designed bend as used on a windsurfer. My design uses the mast straight...I'll need to come up with a new sail but that was to be expected. I originally planned a short 15 minute trail but everything was performing beyond my expectation (excepting the sail luff) so I pointed "RC" towards Tampa Bay. Kept thinking about Steve and how he would have loved the modifications, I talked out loud as if he were with me. After all, no one could hear me, except Steve; rewarding conversation. I ended up sailing out to a spoil Island in Tampa Bay and back, a total of 6 miles at an average of 3 knots, not bad considering what little wind there was had calmed to glass half way home. I had hit 5 knots on a beam reach sailing and average about 2.5 knots paddling. Sailing was so nice, I could sit on the aka support beam or stand without fear of tipping. The outrigger is just perfect - over all beam is 8'- that is stability. Now for the finish work and a few other add-on's like a bowsprit that will hold the new 2.2lb claw anchor and double as a hand lift and bow eye for pulling through the flats. I also sailed in 6" of water today - the leeboard and rudder easily kicked up to match the depth. I'm thrilled so far...no doubts about durability to handle the Everglades!

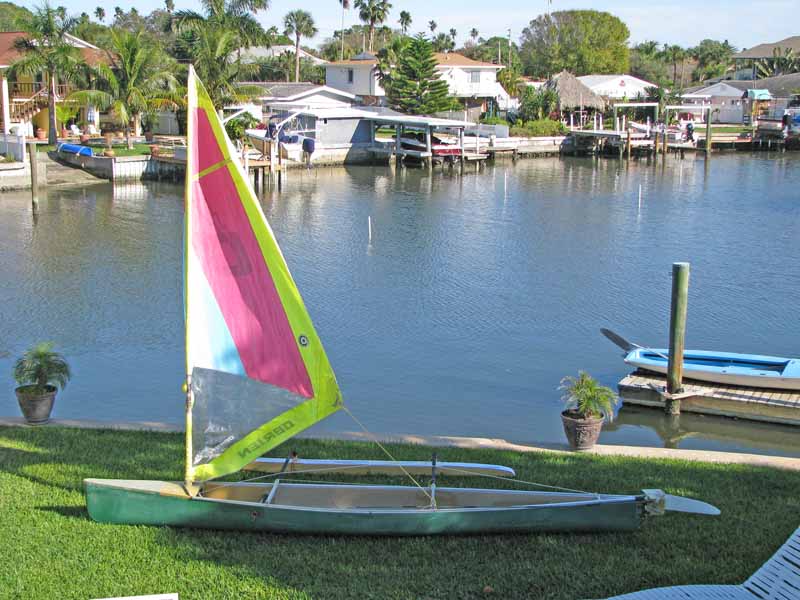
Have had a difficult time deciding what to do about a proper sail since sailing with the windsurfer sail. I think Steve would have found a used or discarded sail and cut it to fit. I wanted to do exactly that but time and office work kept getting in the way. I am doing so many mods on Steve's old Wenonah that my time to Everglades is becoming severely limited. I want this canoe to perform well so today I picked up a brand new Hobie Adventure Island sail at Tackle Shack in St.Petersburg. These 57.5 sq ft sails are well designed & built and fit almost perfect on the carbon fiber windsurfer mast I am using. It is also lighter weight then the Hobie two part mast but I will need to add about one foot at the top to make room for the furling drum and adjustments below. I'm thrilled with the sail...perfect fit for Robinson Calusa. These sails currently only come in two base color themes (red or yellow) and the yellow blended best with the green canoe according to my coworkers. Next I'll be making a roller furling drum for the mast. Robinson Calusa is really starting to take shape now. I'd like to race a Hobie Adventure Island for comparison - both weigh about the same and have the exact same sail but the hull's are like night and day. Some Hobie AI's hit 10mph according to youtube videos - this should be interesting. Tomorrow morning I'm off to Tampa to pick up a Pfaff heavy duty sewing machine needed for making the canvas end covers required to keep the large waves and rain out of the boat. One huge advantage Robinson Calusa has over the Hobie AI is load capacity... Hobie AI - 350lb... Calusa - 950lb - The AI will have an advantage going to weather with it's far lower hull but I really don't see that being a huge factor. Bet I stay dryer!
The actual Everglades Adventure will be covered in a few months on another page. The equipment list is extensive but for the most part fairly lightweight.
My measurements of Steves now modified Wenonah Odyssey Jensen 18 - Depth: Bow - 18", Center 13", Stern 15". Width: Maximum 34 1/2" - with outriggher - 8', Length: 18.5 waterline, overall 21.5', outrigger length - 12', Gunwale 33", Waterline 32 1/8". Rocker: Minimal - Kevlar Ultra-light - 42lbs
Best guesstimate weights: added 28lbs in epoxy, Kevlar, Carbon Fiber, and fiberglass - 5lbs leeboard and 5lbs rudder so the base canoe is around 80lbs - outrigger with aka's about 20lbs - mast 5lbs - sail 5lbs - total weight including lines aproximately 110lbs - rated capacity is 950lbs at 6" waterline. Intended load is 350lbs including myself - 190 plus 160 in gear - 10gals water=80lbs to be continued!!! Hope you enjoyed reading a little about my Everglades Project
...the answer is blowing in the wind...
'Robinson Calusa' is now ready to tackle the Everglades Wilderness Waterway Steve!
email paul@paulsedwick.com